A flawed print wastes material, electricity, and, worst of all, client confidence. It’s absolutely infuriating to spend hours on a complex model only to find the dimensions are off.
The solution isn't magic; it's meticulous engineering. It’s about achieving expertise through 3D printer calibration. This isn’t a one-time fix; it’s the definitive blueprint for transforming your machine from a hobbyist toy into a professional instrument. We'll guide you from the foundational 3D printer calibration cube test to the high-stakes Resin Exposure Range Finder (3D printer calibration print), ensuring your output is flawless every single time.
The Absolute Foundation: Controlling Your Environment Before 3D Printer Calibration
Your printer lives in a chaotic world of temperature shifts and hidden vibrations. A truly accurate 3D printer calibration demands a controlled environment. If you skip this prep, your perfect settings won't hold up for more than a day.
Environmental Stability: Why Your Location Silently Ruins 3D Printer Calibration
-
Temperature Consistency:
Temperature stability is non-negotiable for professional work. When printing materials like ABS or Nylon, a swing in the room can cause massive thermal contraction and warping mid-print. If your machine is next to an office HVAC vent or a drafty window, you are doomed from the start.
-
Vibration and Resonance:
If your 3D printer sits on a lightweight or unstable surface—every vibration from nearby footsteps, doors closing, or running machinery can affect print quality. These subtle movements cause unwanted “ghosting” or “salmon skin” patterns that distort your model’s surface finish. To achieve professional-grade precision, place your printer on a heavy, vibration-dampening workbench or use dedicated anti-vibration feet. A stable, level foundation minimizes resonance, enhances layer alignment, and ensures consistent dimensional accuracy across every print. Proper vibration management isn’t just about aesthetics—it’s a critical factor in achieving smooth surfaces and long-term printer reliability.
Physical Prep: Tightness, Alignment, and Z-Offset
Before running any G-code, you must mechanically verify your machine. This is the simplest demonstration of calibrating.
-
The Critical First Step: Perfect Z-Offset and Leveling (FDM/Resin):
For FDM, the gap between the nozzle and the bed must be precisely the thickness of your first layer (often ). Use a thin feeler gauge—not just paper—to dial this in. For Resin, the build plate must be perfectly parallel to the FEP film. A bad Z-offset here leads to immediate print failure.
-
Tightening Belts and Screws: Eliminating Mechanical Slop:
Loose belts on the X and Y axes are a classic culprit of dimensional inaccuracy. You should be able to press on the belt with your finger and feel minimal give. Take the time to check every major bolt and V-roller for unwanted play; slop is the enemy of precision.
The Core Steps: Mastering FDM 3D Printer Calibration
For FDM users, the journey to a successful print starts with verifying that the machine extrudes exactly what the slicer commands. It's a sequential, logic-based process.
E-Steps Calibration: The Foundation of FDM Accuracy
E-Steps (Extruder Steps Per Millimeter) are a firmware setting. They determine the raw amount of plastic the motor feeds into the hot end. Get this wrong, and every other setting is just lipstick on a pig.
-
Why E-Steps are Essential for Reliable 3D Printer Calibration
If your E-Steps are off, you're either pushing too much material (over-extrusion), which makes parts too thick and features mushy, or too little (under-extrusion), resulting in weak, gappy layers.
-
The Hands-On E-Steps Adjustment Process
To calibrate, heat your hot end, mark on your filament above the extruder motor, and then command the printer to extrude . If, for instance, you measure remaining (meaning were extruded), you need to adjust. Use the formula: . Don't forget to save these new values to your printer's permanent memory (EEPROM) and check again!
Flow Rate & Extrusion Multiplier Tuning
Once the E-Steps are locked into the hardware, the flow rate compensates for the volumetric behavior of the specific filament you’re using.
-
Achieving the Perfect Wall Thickness: The Relationship Between Flow and Dimensional Accuracy.
The best way to check this is by printing a simple, single-wall cube (set infill, top/bottom layers to zero). If your slicer's line width is set to but your caliper reads , your flow is too high. Adjust the Flow Rate (or Extrusion Multiplier) in your slicer software (typically in increments) until the measured thickness matches your commanded width. This small adjustment is the secret to accurate assembly fits.
-
Advanced Material Compensation.
If you switch from standard PLA to a carbon-fiber filled PETG, you must re-run this flow test. Different materials have different melt pool viscosities and extrusion rates, making Flow Rate a material-specific, software-driven part of 3D printer calibration.
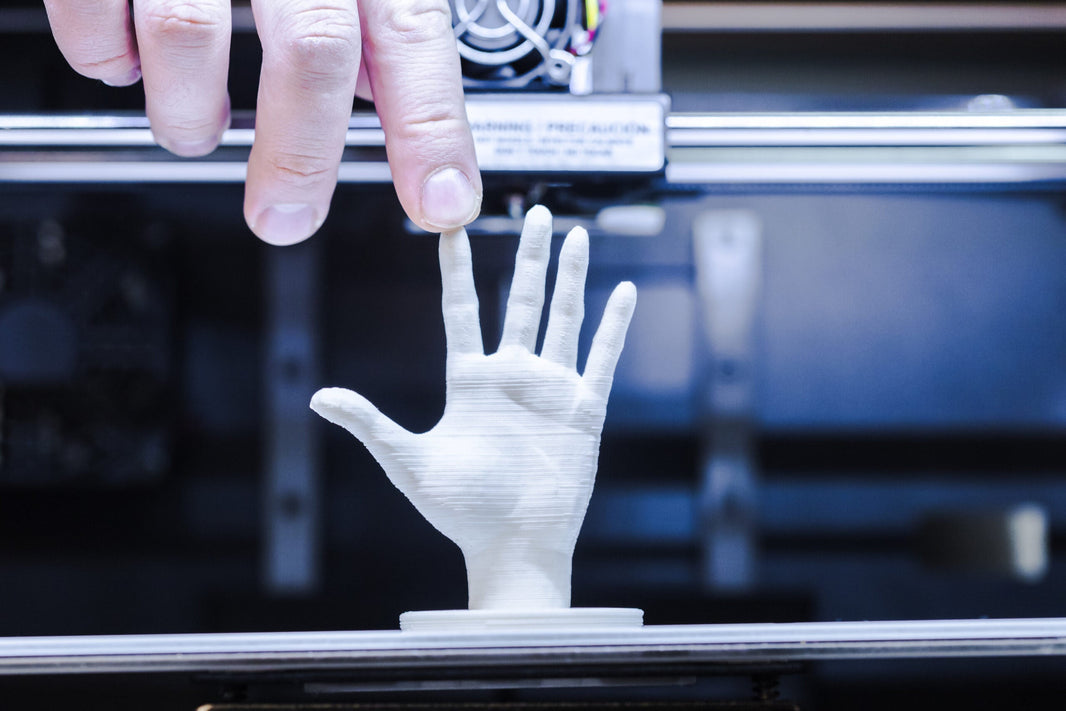
The 3D Printer Calibration Cube Test: Dimensional Accuracy Check
The classic 3D printer calibration cube is still the gold standard for final mechanical validation.
-
Printing the Ultimate 3D Printer Calibration Cube.
Download and print a standard cube. While some experts prefer larger prints to reduce measuring error, the cube is fast and highlights the most common flaws (like over-squished bases and corners).
-
Analyzing the Results: Correcting X/Y/Z Scaling Errors
Use high-precision digital calipers to measure the X, Y, and Z axes. If you have a systemic error (e.g., all X-axis measurements are ), you may have a hardware issue, but often a slight final adjustment to the X/Y steps/mm in the firmware is needed to truly dial in dimensional accuracy.
Precision-First: Essential Resin (SLA/DLP) 3D Printer Calibration
For micro-prototypers and dental professionals, Resin printing is the reality. The success of a surgical guide or a patient-specific impression tray hinges on the correct light exposure.
The RERF 3D Printer Calibration Print Method (Exposure Test)
In resin printing, the 3D printer calibration print is all about light control. The RERF (Resin Exposure Range Finder) tests multiple exposure times simultaneously.
-
Understanding the Exposure Time Matrix for Resin Calibration
If the exposure time is too short (underexposure), your model will be soft, sticky, and weak. Too long (overexposure) leads to light bleed, which makes small holes close up and causes tiny features to swell, losing critical dimensional accuracy needed for mating parts. -
Analyzing the 3D Printer Calibration Print to Select Optimal Cure Time
After cleaning and final curing, analyze the various sections of the RERF print. Look for the model that shows the sharpest, most defined positive features (pins, lattices) without losing the smallest negative details (tiny holes, gaps). That exposure time is your optimal baseline for that specific resin.
Z-Axis and Lift Speed Optimization
These mechanical settings prevent catastrophic print failures unique to the peel process of resin printing.
-
Preventing Layer Separation: Calibrating Lift Speed and Distance
Every layer is cured to the bottom of the vat and must be peeled off. If the build plate lifts too quickly, the vacuum and separation forces can crack the layer or cause the print to detach completely. You need a lift speed that is slow enough to prevent catastrophic failure, yet fast enough to maintain productivity. -
Fine-Tuning Z-Height for Perfect First Layer Adhesion
The Z-zero (home position) on a resin printer determines the initial compression of the FEP film. Too much compression can damage the screen; too little causes the first layer to fail to adhere. This tiny setting is the difference between success and a vat full of cured flakes.
Measuring for Accuracy: The Role of the Boom Pad and Precision Tools
To back up your claims of precision, you need irrefutable data.
-
The Right Tools: Using Calipers and Micrometers for Verification
Ditch the tape measure. Professional work demands measurements verifiable by certified digital calipers ( resolution) or micrometers. This is how you prove your results to a high-end client. -
Post-Processing Prep: Achieving a Flat Base for Accurate Measurement (Integration of Boom Pad)
To accurately measure the Z-axis of a printed part, its resting surface must be perfectly flat and perpendicular. Post-cured resin or FDM support nubs will create an uneven surface, skewing your caliper reading. Utilizing a precision surface finishing tool like the UFM Design Boom Pad allows you to quickly and accurately level the base, guaranteeing that your measurement data is true and reliable.
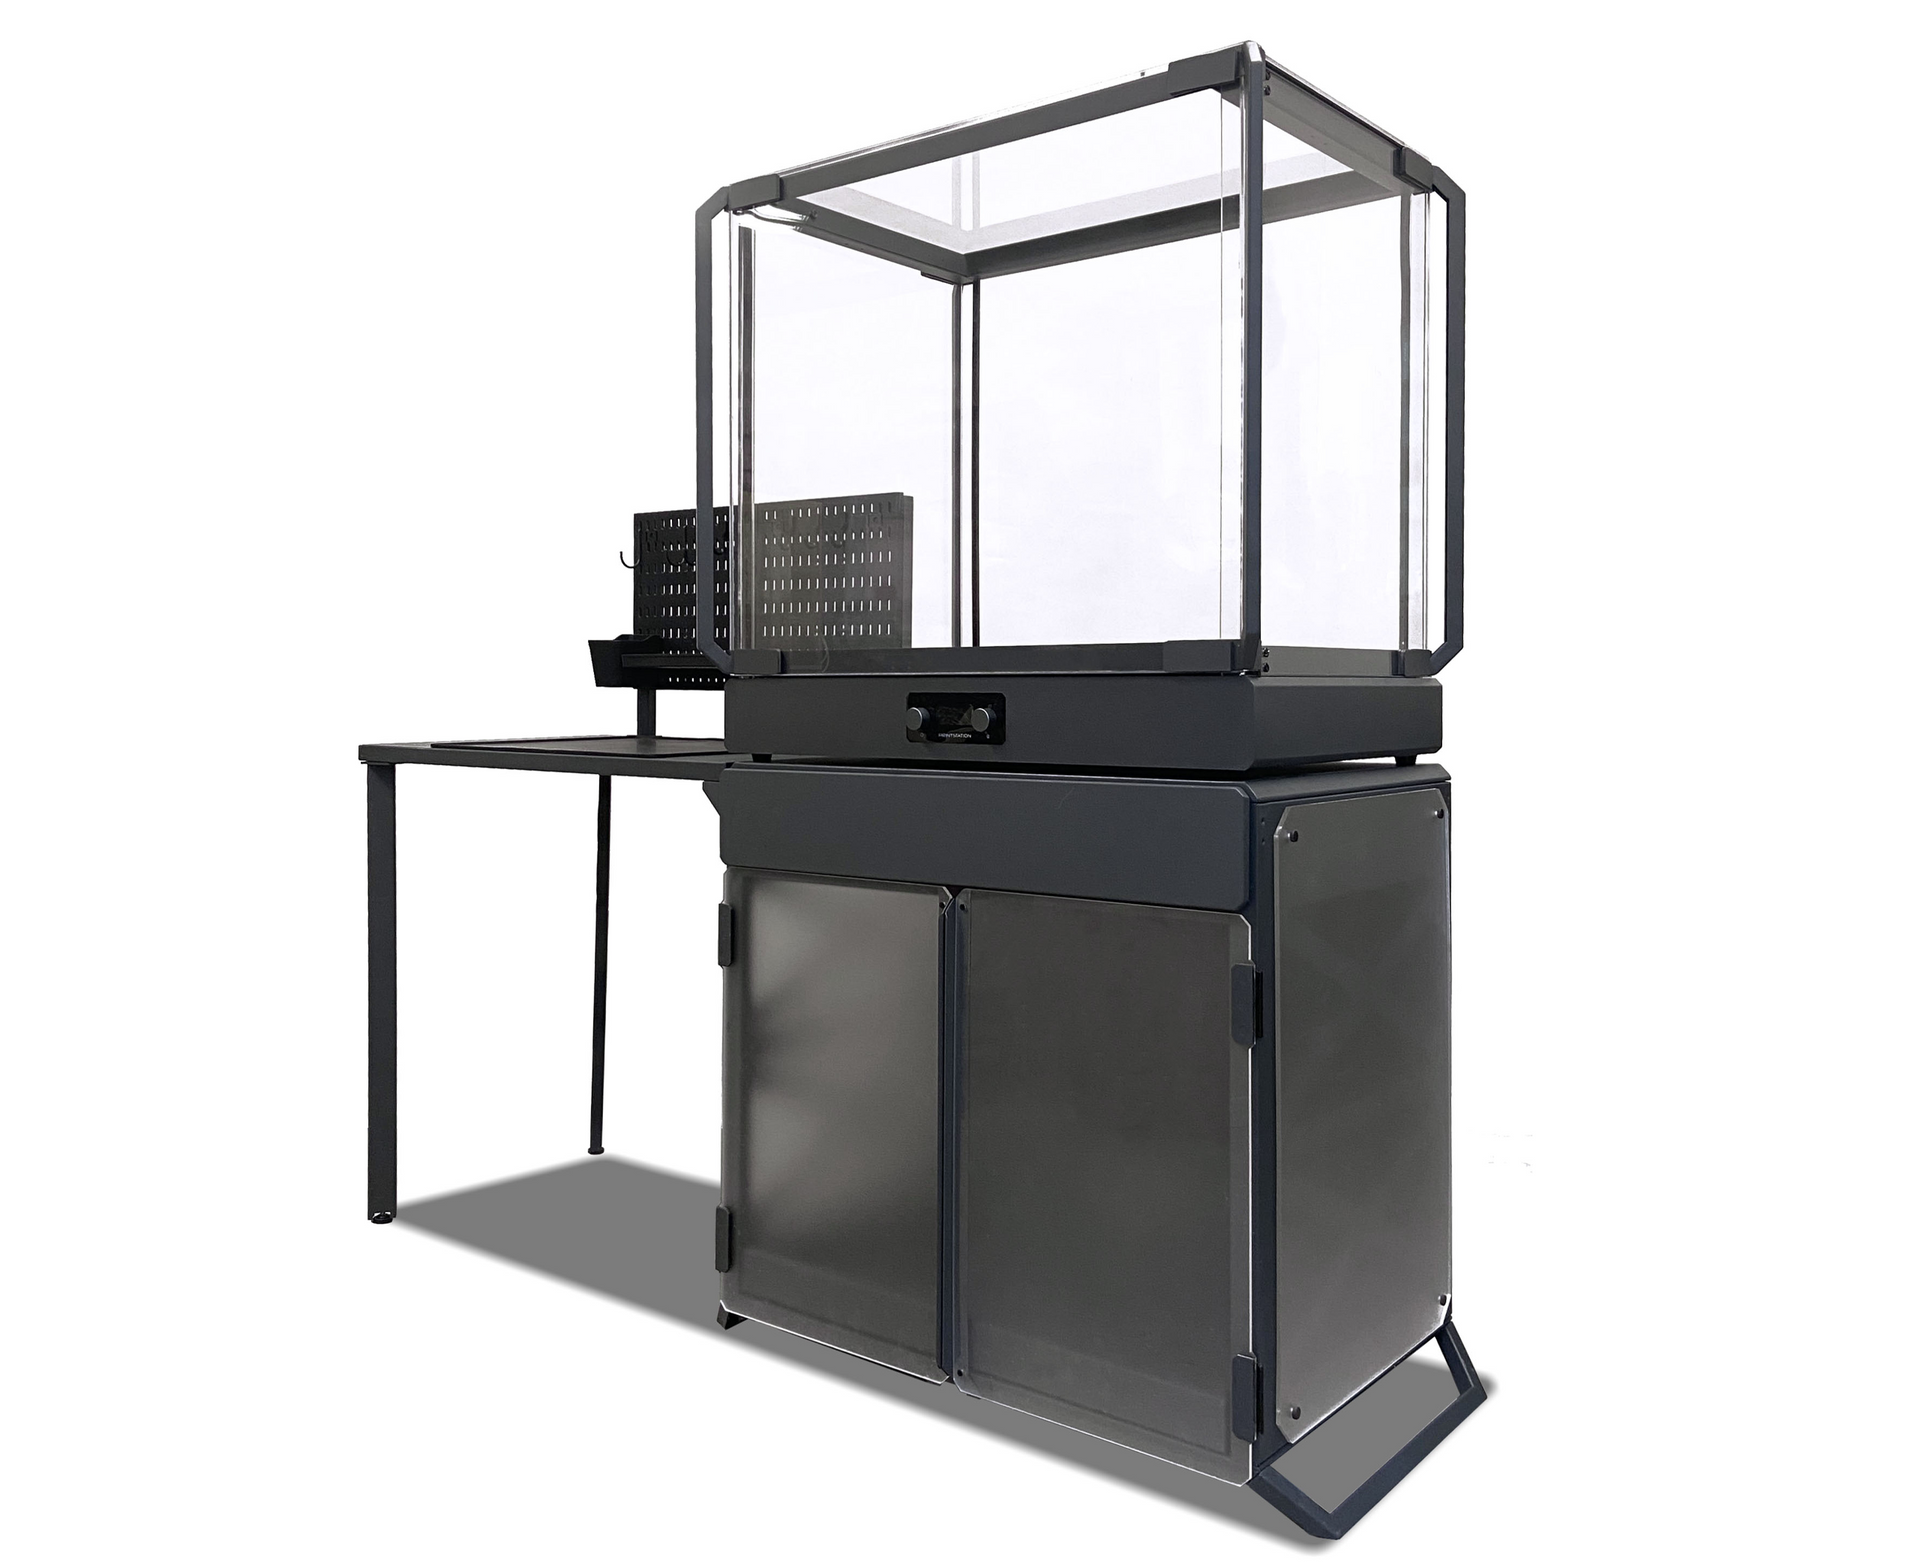
Workflow Consistency: Using PrintStation for Stable Calibration
Environmental control is not just for printing; it's for preserving your calibration over time.
-
Controlling the Uncontrollable: How a Stable Environment (like PrintStation) Maintains Calibration
An insulated, actively filtered enclosure, such as the UFM Design PrintStation, locks in temperature and blocks dust. This is essential because if the ambient temperature swings wildly, the thermal expansion of the printer's components will cause your hard-earned calibration to drift. -
Thermal Management: Ensuring Calibration Holds Across Long Prints
Maintaining a constant, ideal temperature prevents differential shrinkage and warping in large models, ensuring the dimensional accuracy you calibrated for holds true for the entire build time.
FAQ: Top Questions on Your 3D Printer Calibration Journey
Question 1: How often should I perform 3D printer calibration?
You shouldn't need to re-calibrate E-Steps or axis steps/mm unless you install new firmware or replace a major mechanical component. However, the following checks are necessary:
-
Z-Offset/Bed Leveling: Visually check before every mission-critical print, or at least weekly.
-
Flow Rate/Exposure Time: Every single time you switch to a different filament type or a new resin brand.
Question 2: What is the easiest way to check if my bed is level?
The easiest and most effective way for FDM is to print a simple, single-layer square covering most of the bed area. Visually inspect the thin lines: if they are too thin or gappy, the nozzle is too far from the bed; if they overlap and look rough, it’s too close. Adjust your Z-offset accordingly.
Question 3: Is software or hardware 3D printer calibration more important?
Hardware calibration is the absolute priority. If your printer's stepper motors physically don't move the distance they're commanded to (E-Steps, X/Y/Z steps/mm), no amount of software tuning can fix the fundamental dimensional error. Software calibration (Flow Rate, temperature) is secondary; it refines and compensates for material properties. You must master the hardware first.
Summary: Your Next Step to Flawless 3D Printer Calibration
3D Printer Calibration is the ultimate key to professional reliability. By adopting a disciplined approach—from stabilizing your environment with the PrintStation to verifying dimensions with a perfectly prepped surface from the Boom Pad—you shift your output from hobbyist chance to expert guarantee. This commitment to precision builds the trust necessary to land high-value contracts in demanding sectors like dental manufacturing.
Explore the UFM Design, to deliver absolute dimensional accuracy and a cleaner, safer printing environment. Upgrade your setup today and print with precision, confidence, and control.